

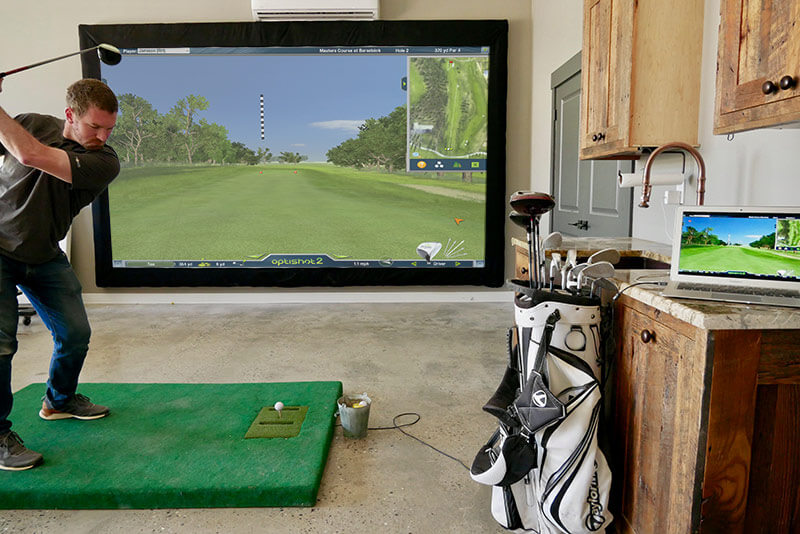
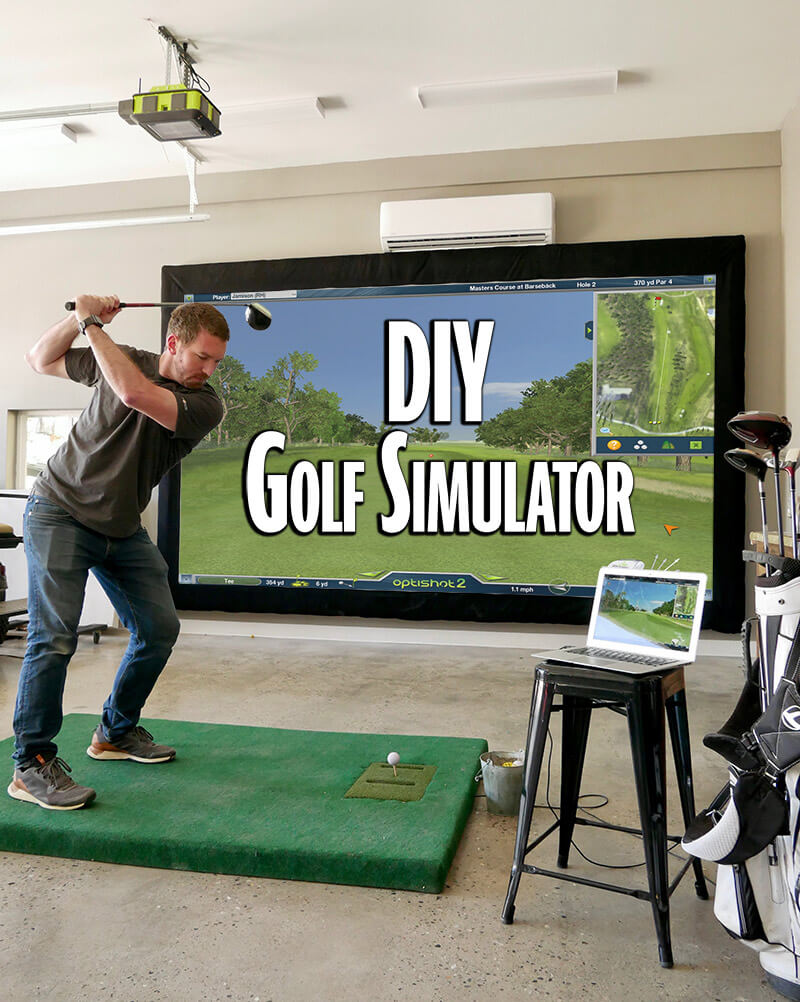
This is a project that I actually complete a few weeks ago and I am glad I did because with the stay at home order it has been a blast to have in the shop. This DIY golf simulator is about taking an otherwise inexpensive sensor and trying to make the experience as realistic as possible. It is also about having a dual purpose setup where the screen and projector can be used for standard TV/movie viewing as well as a golf simulator.
If you love this stuff as much as we do, you might want to consider subscribing to our YouTube channel and following us on Instagram where we post sneak peeks and behind the scenes stuff in our stories. Also, did you know you can get tons of projects plans from all around the web when you follow us on Facebook and Pinterest!
Tools
Stance Pad Materials
Screen Materials
- Projector
- (6) 2x4s
- lengths depend on screen size
- 3-1/2″ Wood Screws
- 1-1/4″ Washer Head Screws
- 6″ Bungees
- Projector Screen
- Office Staples
- Heavy Duty Staples
- Batting
- Black Fabric
- Double Faced Tape
Disclosure: The links provided in the “materials” and “required tools” sections are affiliate links. If you would like to support our site and help keep our content free come find out more about how we can make money with no extra cost to you.
Time needed: 2 days.
The tutorial below will show you how to make a golf simulator using the OptiShot 2 sensor. Keep in mind that the screen we are building in this example is for foam balls only.
-
Upgrade the Turf on OptiShot 2
My one main issue with the OptiShot 2 is the turf that comes on it. The turf is thin and the surface beneath it is hard. So if you take any type of divot it is all the more obvious. Luckily I stumbled upon Arsene Golf where they make upgraded turfs specifically for the OptiShot. I went with the JagManJoe Tee Line turf which is easy to swap out (everything is velcro) and much more realistic to hit off of.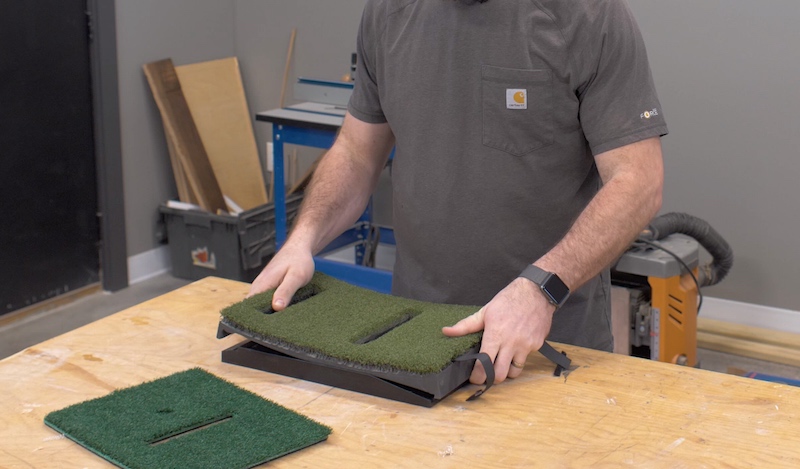
This issue is that now the hitting pad is that much higher off the ground so we need to build a stance pad to bring the ground around it up to the same height. -
Building the Stance Pad
To increase the height with as little weight as possible we are using 2 inch foam board insulation with 1/4″ plywood adhered to both sides. This will keep the foam from collapsing.
I made my stance pad 4 feet by 6 feet. This allows for even the tallest of friends to have enough room on the pad (with a driver) and not feel like they are going to accidentally step off the back. The plywood and foam board can be cut down with a circular saw all at the same time. Lay the 1/4″ plywood on top of the foam and set the saw depth to not cut quite all the way through the foam. After making the cut, snap the foam board end off. If you want you could save this excess and make a floating pad for your left handed friends.
Layout the sensor where you want it and cut the hole with a circular saw and remove the foam below it. Then mark and drill a large hole in the foam for the USB cord from the sensor to exit.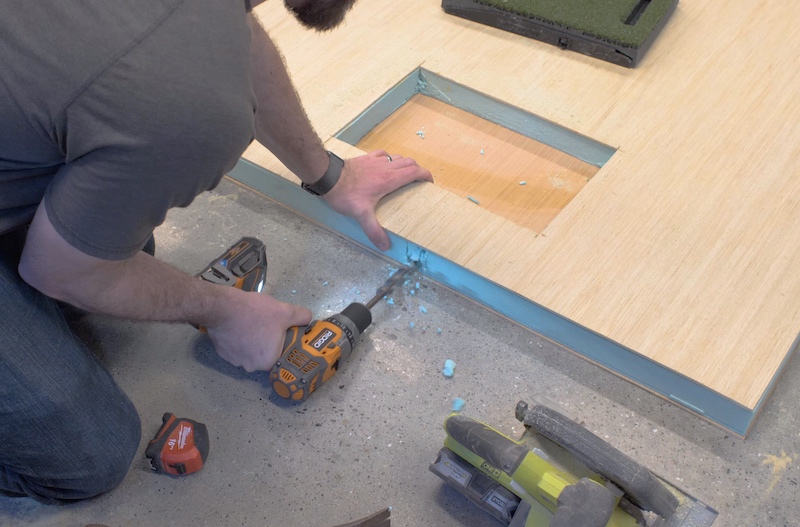
-
Adding Padding
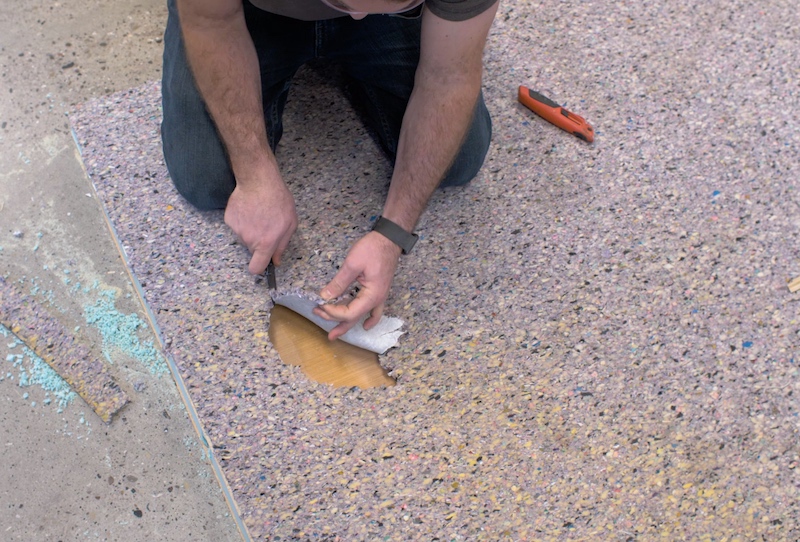
Carpet pad will soften up the surface that you are standing on and make it feel more realistic. Apply a layer of carpet pad adhesive or spray adhesive and cut the carpet pad to fit. I found that you can buy a rug pad which is the same thing but comes in a smaller size for about $25.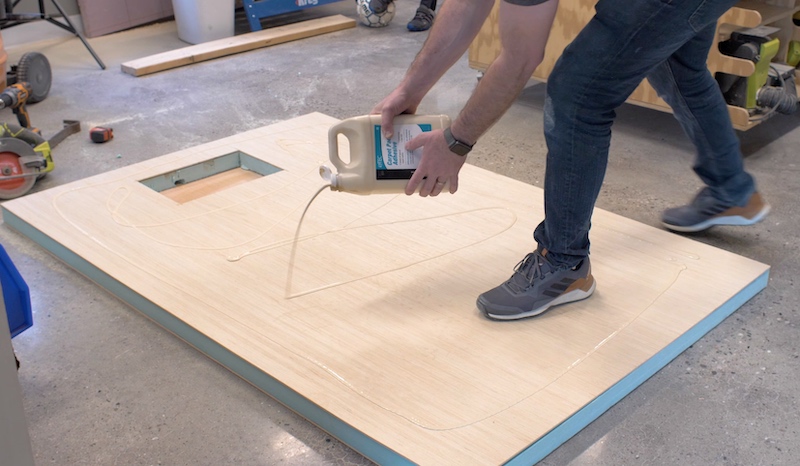
I now realize that I was cutting the pad upside down and it would have been a lot easier to cut with the vapor barrier (plastic layer) up. I even installed it upside down .
.
-
Adding the Turf
I was able to pick up an outdoor rug that looks like turf for about $20. I then wrapped the stance pad with it and stapled it to the bottom, trimming any excess.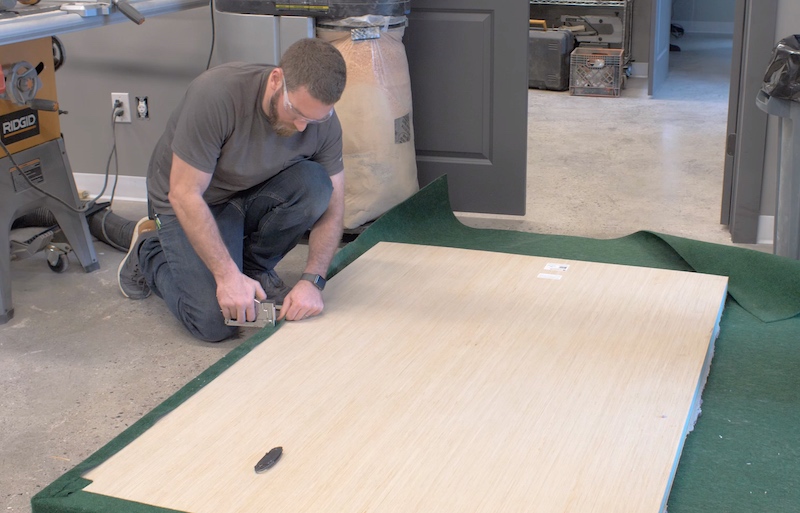
-
Installing the Sensor
After the bottom was stapled I flipped it over and cut the hole in the turf for the sensor. I left a little extra to wrap the sides of the hole. You could try to tuck it between the plywood and foam but I found that with the sensor in place it was tight enough that it didn’t move.
Measure the height of the sensor and add plywood scraps under the sensor to make sure the turf is slightly higher than the stance pad. I found that this is best because if you take a divot sometimes the club will sweep through and hit the start of the turf that covers the stance pad at the end of the sensor and could pull it up a bit. If you get the XL turf upgrade that won’t be an issue.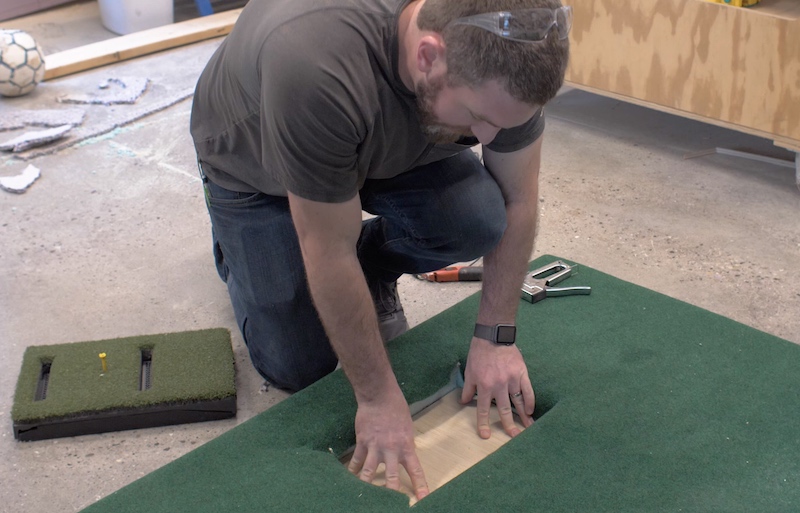
Locate the hole in the foam for the USB cord and cut a hole in the turf. Feed the USB cable through the hole and plug it into your sensor. Then slip the sensor into place. Mine was a very snug fit but if you can get it in place then you may need to trim the plywood and/or foam a bit.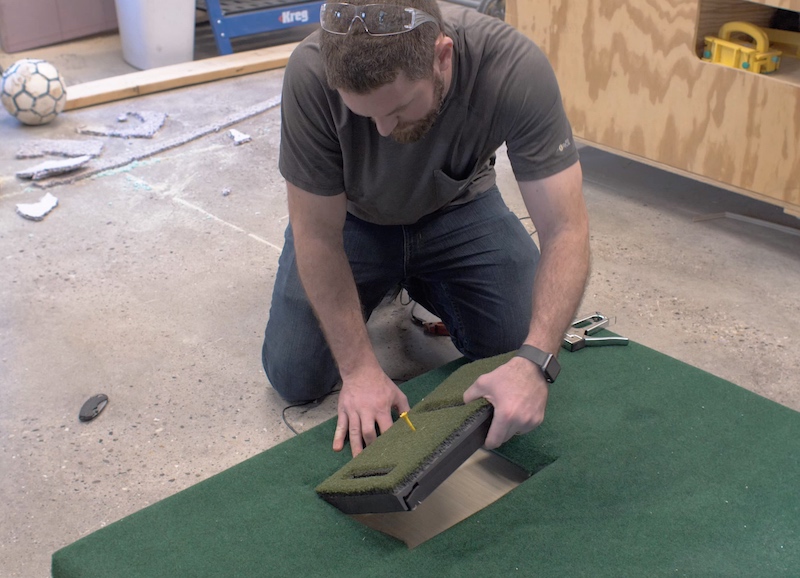
-
Determine your Screen Requirements
If this is going to be strictly a golf simulator then simply hanging a drop cloth could be enough. However, I had a few requirements for my screen.
– No real golf balls, only foam (glass garage doors and concrete floors don’t mix well)
– Has to double as a TV screen
– Not too intrusive, must be close to wall.
– Has to be able to handle some ambient light
With these requirements, I ultimately decided to build a frame that would suspend the screen 5″ or so off the wall and keep the 16:9 screen taught with bungees. The screen needed to stay tight to keep a good picture but it also needed to flex enough to absorb the energy of the foam ball. The screen I went with was an 180″ ALR (ambient light rejecting) 16:9 projector screen.
I wasn’t 100% sure whether or not the balls would damage the screen but after having played on it for weeks now I haven’t noticed any damage. If you are looking to hit real golf balls then I would recommend an enclosure with impact screen like this. -
Installing Top Screen Support
To get started on the frame I assembled two 2x4s in the shape of an L for the top and bottom. The overall frame length should be 12″ more than the screen. Since we will be attaching 2x4s to each end for the sides of the frame we need to subtract the thickness of the 2x4s (2 x 1.5″ = 3″). Therefore the L shaped parts of the frame (top and bottom) should be 9″ longer than the screen.
Before installing the L on the wall, stretch the screen out on the ground and center the L at the top of the screen. Then install 1-1/4″ washer head screws in the L at each grommet location, leaving the head up enough to get the bungee under it. This is how the bungees will hook onto the frame. The same can be done for the bottom L as well.
Locate the studs, level and secure the L with 3-1/2″ wood screws into the studs.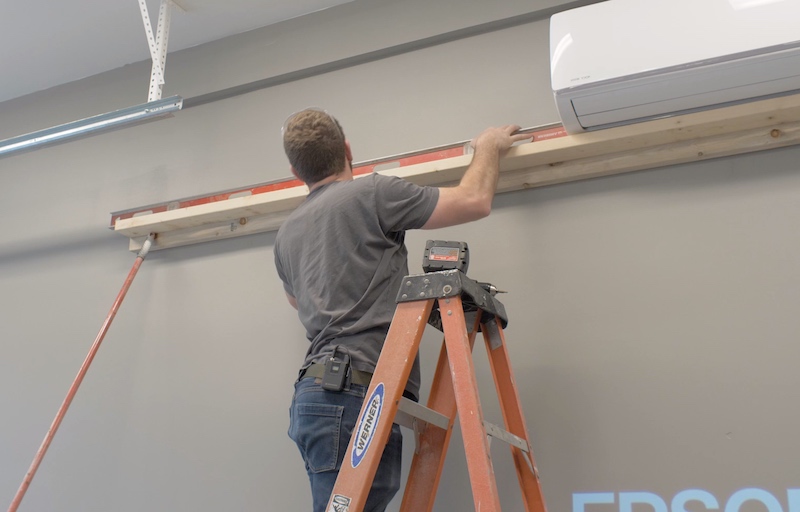
-
Hanging the Screen
Start by feeding the bungee through the back for the grommet and then hooking it onto the corresponding screw on the frame. The ball on the end of the bungee should be bigger than the grommets on the screen.
-
Install the Bottom Support
Measure down from the top of the frame 12″ more than your screen height and make a mark at each end. Make sure the end of the bottom L is plumb with the top L. To do so you can use weight on the end of a string and drop it from the top L end. Or just measure from the corner of the room and make sure those distances are the same.
Locate the studs, level and secure the L with 3-1/2″ wood screws into the studs and use the bungees to attach the screen to the screw heads on the frame.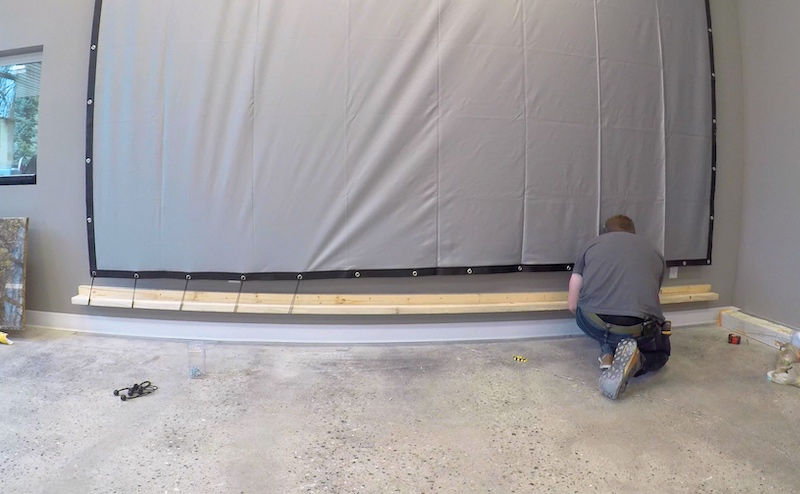
-
Install the Sides
The side 2x4s show be cut to 12″ longer than the height of the screen. Then they can be screws onto the top and bottom Ls using 3-1/2″ wood screws.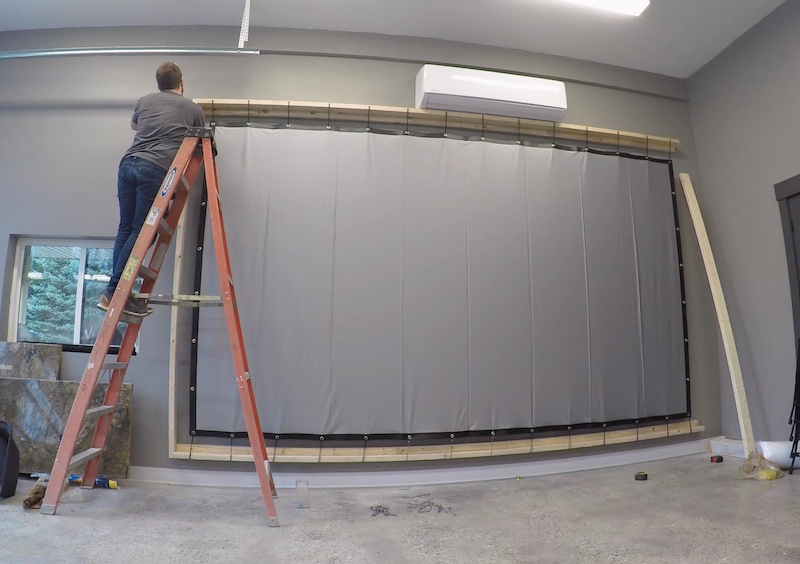
-
Tensioning the Screen
Place the screws for the bungees on the side 2x4s at the same height as the grommets and attach with bungees. Test out the spring back of the screen by hitting a few foam balls into it. If it is too tight, the balls might bounce off the screen too fast. If it is too loose, the balls might hit the back wall and bounce back from hitting a hard surface. Adjust the screw placement on the frame or the length of the bungees to add more tension or take some away until you are happy with the results.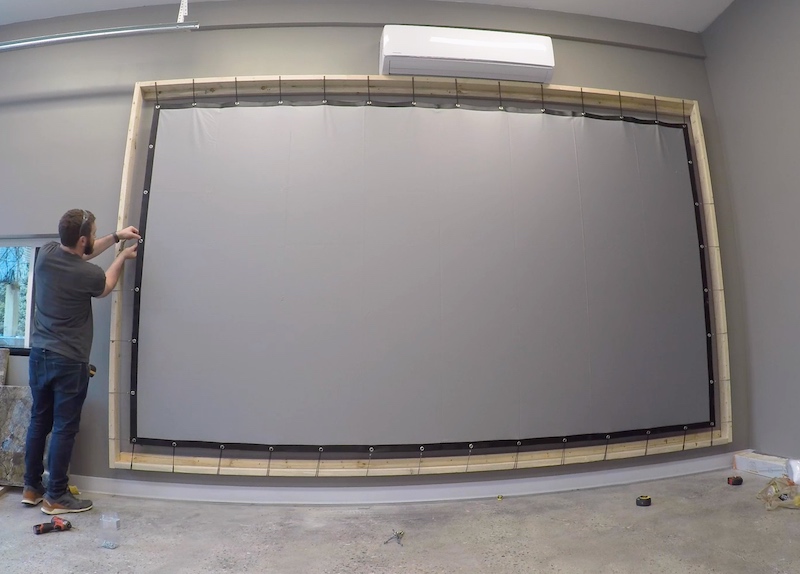
-
Adding Batting to the Frame
To soften the edges of the frame and bungees when wrapping with fabric, first you must cut down strips of batting and staple to the frame, over the bungees.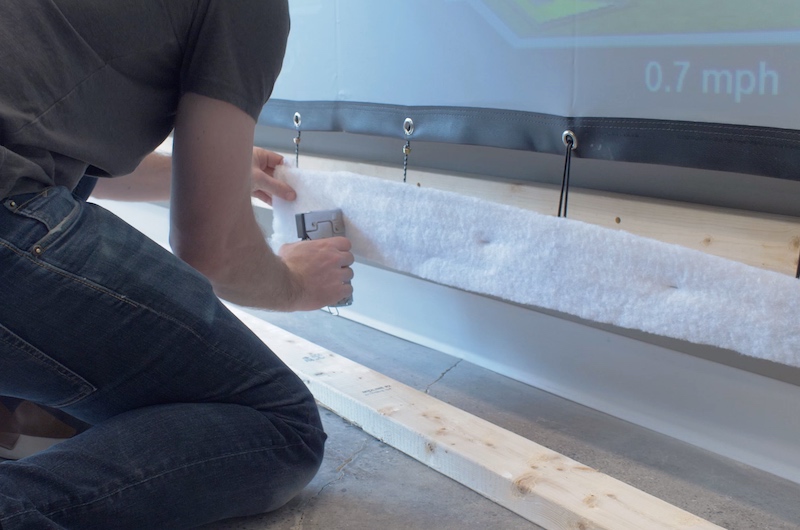
-
Preparing the Fabric
Cut down strips of fabric that are more than big enough to cover the area between the screen and extend to wrap the frame. I just cut my 36″ wide fabric in 1/2 (one for each side). Then apply double faced tape to one side.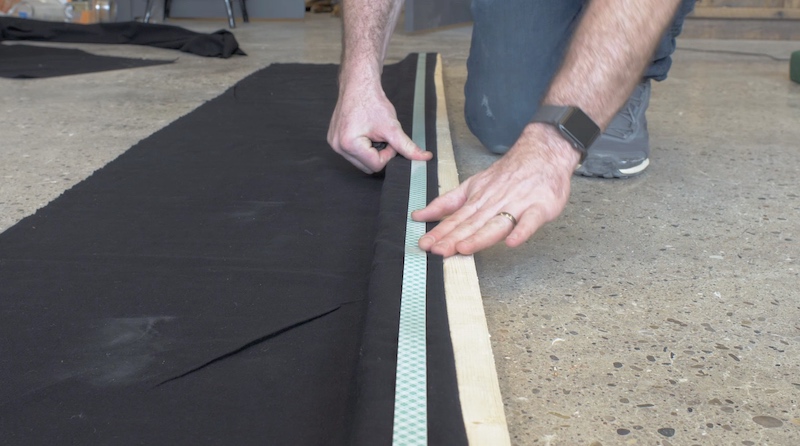
-
Securing the Fabric to the Screen
Temporarily staple or clamp the fabric to the frame so that it is suspended over the screen with the double faced tape lined up with the edge of the screen.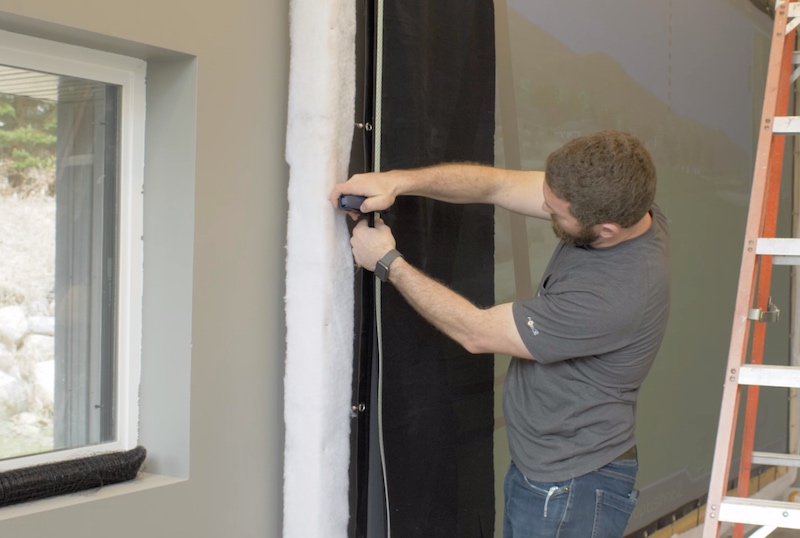
Then staple through the tape and into the black border of screen. The screen itself is thin and staples will easily be pulled through. The double faced tape will not only help keep the staples from pulling through but it will also leave a crisp line on the edge of the fabric.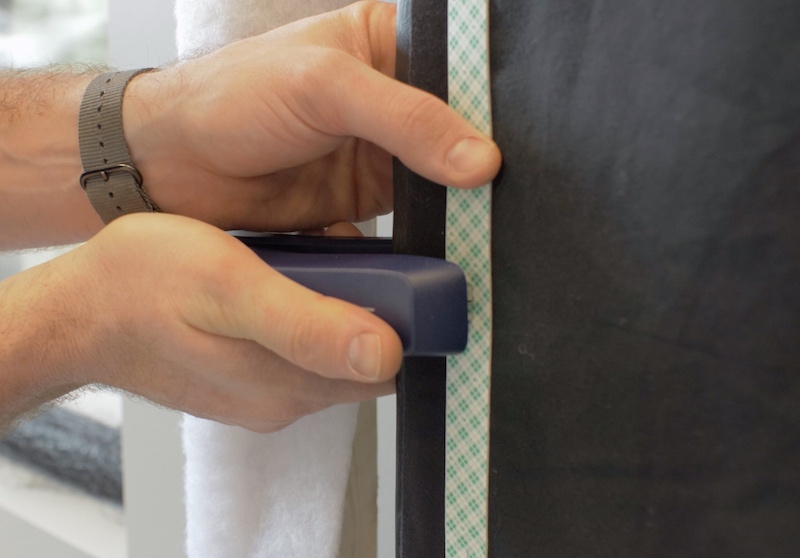
-
Attaching the Fabric to the Frame
Peel the other side of the double faced tape off and fold the fabric over itself and staple it to the frame. Any excess can but tucked behind the frame or folded over and stapled together.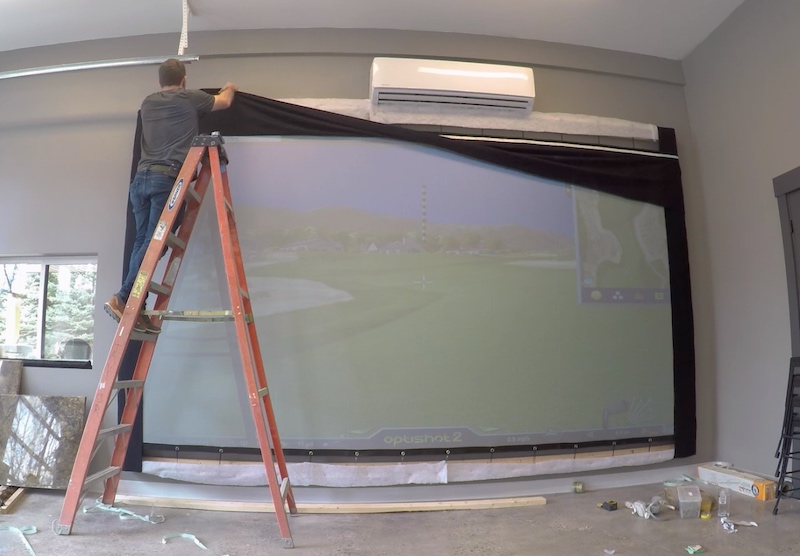
-
Projector & Wiring
Selecting and installing a projector depends on your environment. I have to deal with a lot of ambient light so I went with a brighter projector which you can identify by looking at the amount of lumens. I recommend going with a quality brand like Epson, Optima, BenQ, Panasonic, etc. If you want to save some money, look on your local Facebook marketplace or search Ebay (which is where I got mine).
The USB cord coming out of the sensor gets connected to computer that meets the requirements for OptiShot 2. Then from the computer you can connect to the projector with an HDMI cable. However, since I have an Apple computer and am using an Apple TV for standard viewing, I can connect wirelessly with AirPlay.
Continue reading at Golf Simulator.