

Did you know you can install a roomful of recessed lights with minimal drywall tear-out and patch work? You can easily install these down lights by following our step-by-step tutorial. Plus, you can use the techniques learned here to install other types of ceiling lighting as well.
How to Install Recessed Lighting
See also: 10 DIY Pendant Lighting Projects
1. Cut Holes in the Ceiling.

Technique A
Don’t forget to turn off the power from the main electricity board. After that, lightly mark all places where you want to install your pot lights. Use a stud finder to make sure they do not overlap a joist. Orsimply drill a hole and use a bent wire to ensure your lighting layout is exactly between joists. To make a layout for the lighting, use the template provided with the light to draw a circle on the ceiling.
While wearing safety glasses, carefully cut each hole through the circular layout with a utility knife. Then cut along the inside of the knife line with a drywall saw. But be careful not to cut any wire already embedded in the ceiling cavity!
Technique B
If you don’t want to go through the tedious process detailed above, you can use a hole-cutting saw. This tool saves time and cuts holes in the ceiling very accurately. The best thing is: you don’t even have to draw the outline of the hole on the ceiling! Just mark the center point. However, it’s important to plan accordingly so that you do not run into a joist. Check that the lights fit perfectly into the holes. (They shouldn’t need to be forced into the place.)
2. Rough-In the Wiring
Run a cable from a power source to a switch box and then to the hole where you want your first recessed light. Make sure you leave 16-18 inches of wire hanging from the ceiling as you continue to pull the wire to each light fixture. Thanks to this hanging wire, you’ll have enough slack to take care of all the fixtures. Work carefully and use a drill with a long bit to avoid cutting additional access holes that will need extra patching. If there’s an attic above the ceiling, run the wire through the attic. But if you are installing from below, then you need to fish the wire through the framing of the ceiling using a long flexible drill bit. That way it won’t show up on the flooring of the attic.
3. Insert Cable into Junction Box
When inserting an electric cable into the fixture’s junction, use twist-on wire connectors to make the connections. The fixture’s black wire goes with the black house wire, the white one goes with white wire, and ground wire goes with ground wire. That’s simple to remember, right? The instructions provided by the manufacturer can also help you to sort out all the wires. Once you’ve made all the connections correctly, you can finally stuff the wires in each fixture’s junction box and fasten the covers.
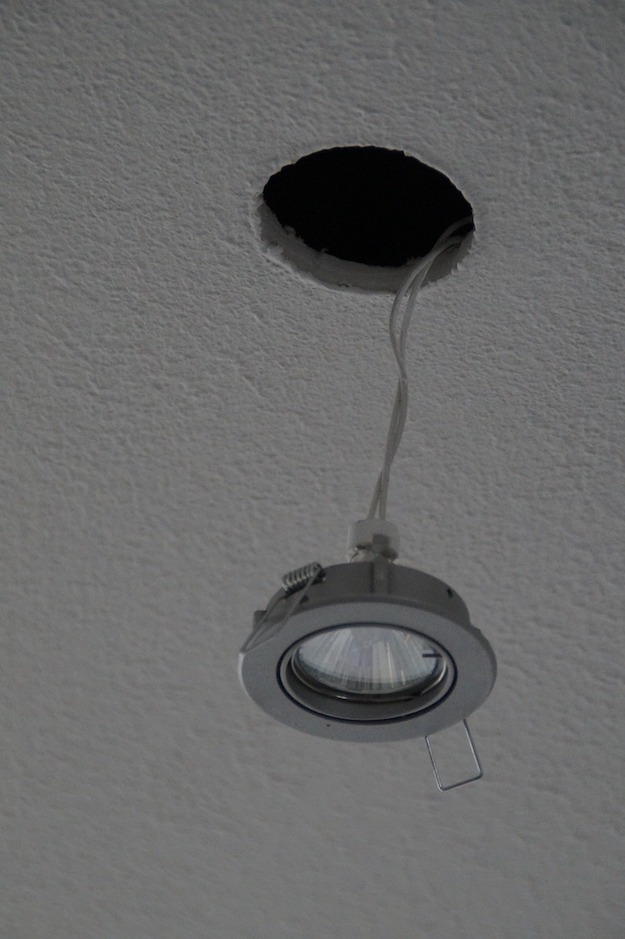
4. Mount the Lights
Most remodel cans come with four clips. Clamp the can to the ceiling by pushing down on the top of the drywall or plaster. Rotate the housing into place in the ceiling so that the mounting tabs are secure. With a screwdriver, push each clip up and outward until it clicks and clamps the fixture.
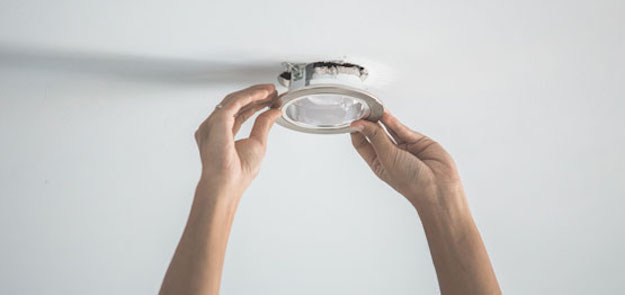
5. Finally, Add the Trim and Light Bulbs
Trims are mounted with coil springs or squeezable springs. Pull out each spring, and hook it to the trim into set position. Push the trim carefully into the housing. Install the light bulbs and turn on the lights. Voila! You can now achieve the perfect ambiance in your room.
Dan Kogan is owner of NY handyman NYC in New York City. He has more than 20 years of experience and is passionate about all things related to home improvement.